
This DIY Berry Basket Will Give Your Home a Festive Feel This Fall
Lend an autumnal flair to your tablescape with these easy-to-make arrangements.
Oct 04, 2021
Our series “Get Crafty" gives you the inspiration for creating inventive DIY projects during the holidays and year-round. This DIY berry basket requires just a few materials and costs very little to make. It also can be used to keep the peace at social gatherings.
Recycle, reuse, reimagine! That is my motto.
In some cases, reusing something seems obvious. Like the pretty ceramic cookie jar with gold leaf accents that I bought a few years ago from Harry & David. Or the vintage highball glasses with the gold leaf design that I bring out around this time every year.
Other times, you have to think outside the box or re-imagine another way to use an item. Case in point — an empty berry basket!
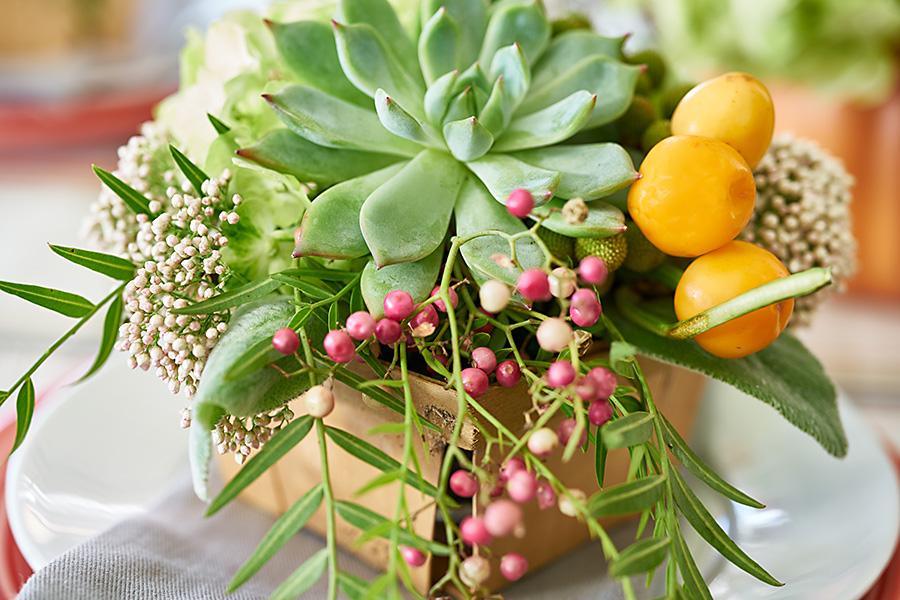
It's the perfect size in which to create a sweet seasonal arrangement, and it doesn't cost you a thing (assuming you've recently purchased fresh berries). I love the farm fresh vibe it gives off, and it doesn't take much to fill it up.

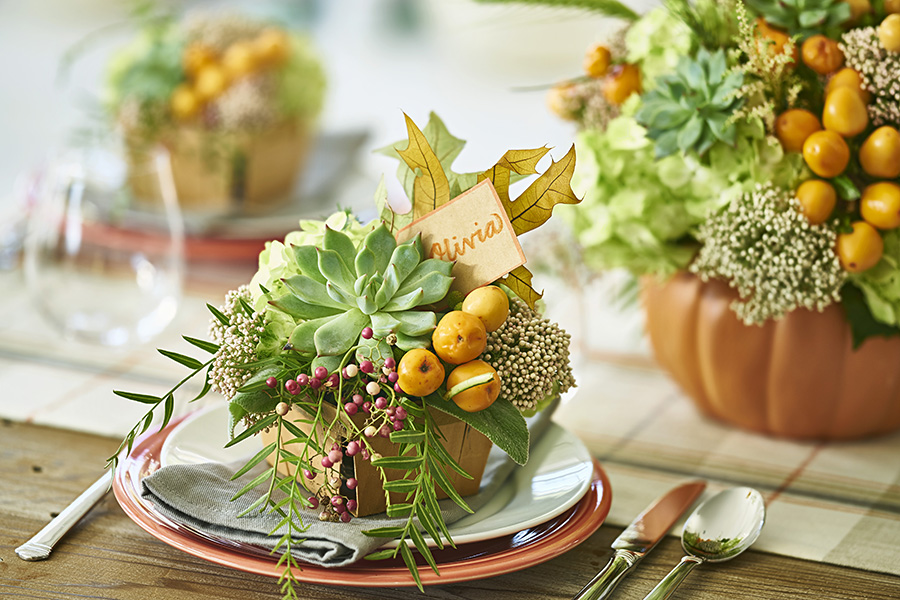
Collect these berry baskets all summer, and you can easily elevate your fall tablescapes with individual arrangements at each place setting.
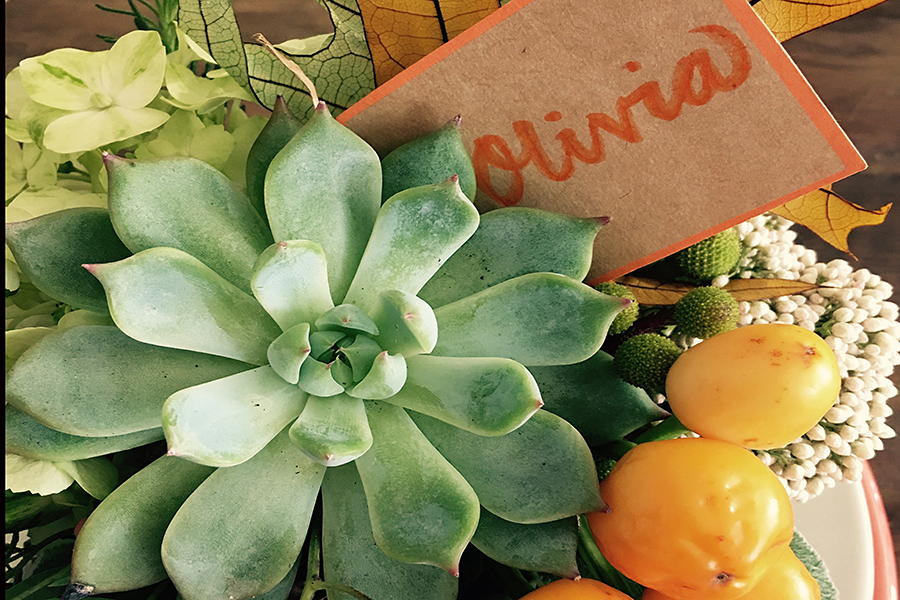
Looking to keep the peace at your next gathering? Slip a name card into each arrangement to manage who sits next to who at your table. Not only does it function as a classy and elegant decoration, but it's an easy way to make sure your guests stay happy and your stress level stays low!
Making the basket
Here's what you'll need to get started:
- Berry basket
- Basket liner
- Floral foam
Four simple steps to making the basket:
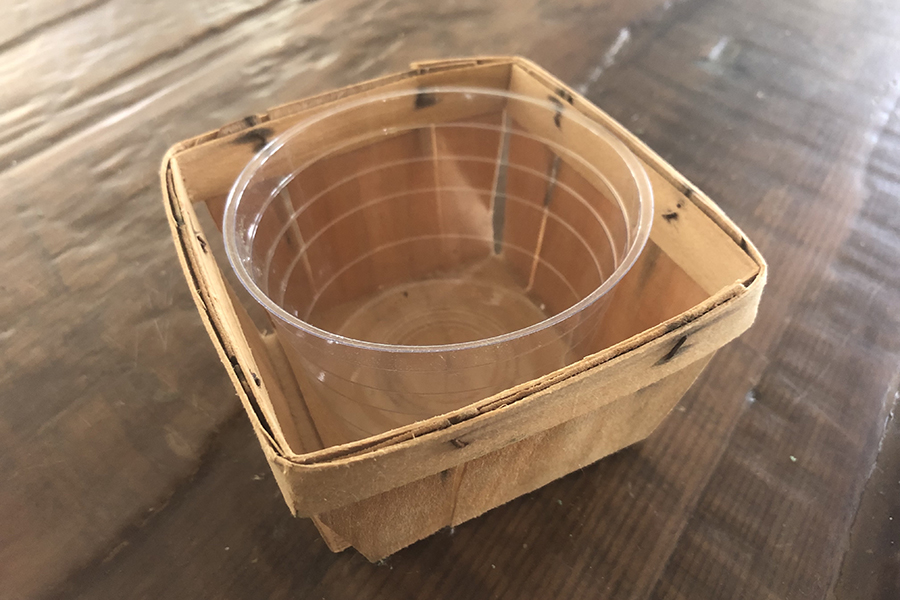
Step 1: Find something that fits the basket, such as a small bowl made of glass or plastic. Place the liner in the basket.
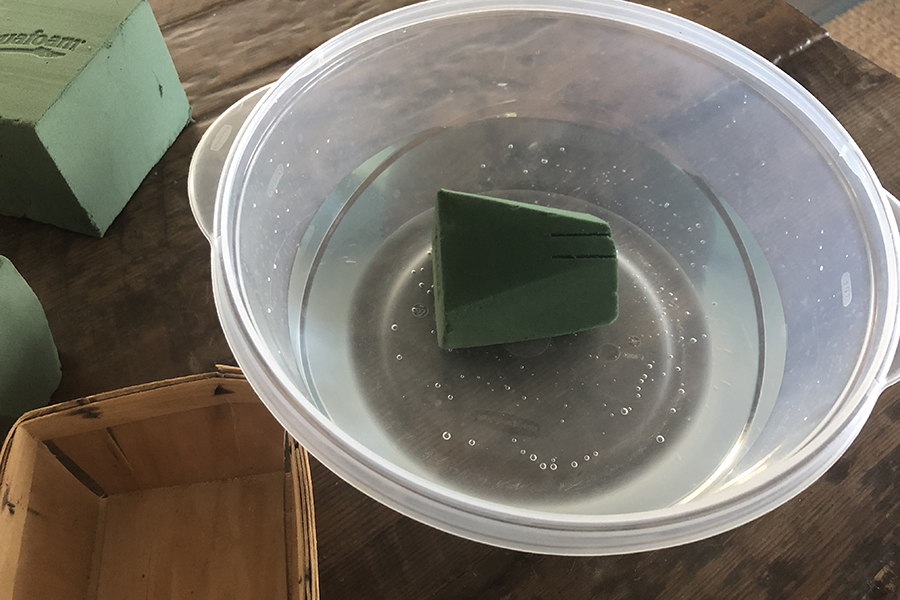
Step 2: Cut a piece of floral foam to fit the liner.
Step 3: Place the foam in a bowl of clean water, allowing it to soak up as much water as it can hold.
Step 4: Once the piece of cut foam has sunk to the bottom of the bowl and no more air bubbles are visible, remove it from the bowl and place it directly into the liner in the berry basket.
Making the arrangement
I use succulents as "cut flowers" quite often. They're very easy to work with, and you will be amazed at how long they last. After a few weeks, you can simply place the cut succulent on the surface of some potting soil and it will form new roots and continue to grow.
All you need to make the arrangement is a succulent and a wooden skewer.
Four simple steps to making the arrangement:
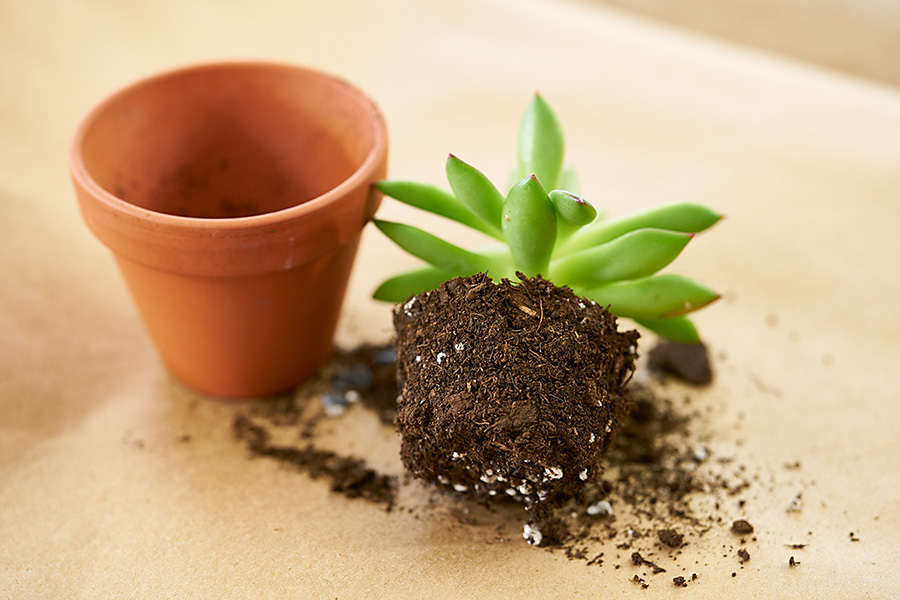

Step 1: Remove the succulent from the planter.
Step 2: Remove the soil, stem, and roots from the succulent.
Step 3: Insert a wooden skewer into the succulent.
Step 4: Insert the skewered succulent into the arrangement. Make sure the end of the skewer goes directly into the floral foam securely to keep it in place.
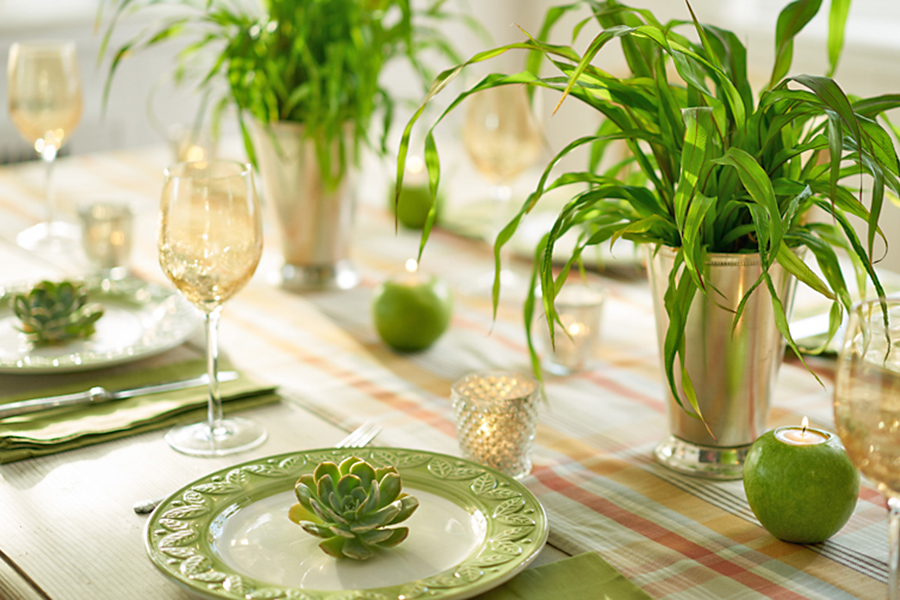
Cut succulents make beautiful cut flowers all year long. I encourage you to reuse your cut succulents again and again in new and creative ways. As you can see, they look gorgeous on a plate...and you can easily tuck a name card between the petals if that's your jam!
AUTHOR

Julie started her career in the floral industry over 30 years ago in a small, family-owned flower shop. From floral designer to author and lifestyle expert, her insight has been instrumental in developing the 1-800-Flowers.com brand. Representing the company’s floral lifestyle vision, Julie has shared her talent and passion in numerous television appearances and national magazine features. She is an active fundraiser and longtime friend of IGHL, a group dedicated to facilitating a more independent life for developmentally challenged adults.


